Does everyone have to go to Lowe's three times per project, or is that just me?
First trip- a quick one to grab paint chips and get hot glue for work.
Second trip- Paint color picked, and asked for chalkboard paint tinted, which I saw on my Lowe's app, so trusted the people behind the counter to get the right thing. I was in a hurry. All this was behind my main man's back because he was NOT on board with this genius idea.
Third trip- After my main man left for baseball practice, I had 4 hours. I set up and looked closely at the paint. It was satin finish. Off to Lowe's I went. Luckily, it's close. The ever so pleasant girl behind the paint counter, (read: snotty) informed me that teachers were buying satin finish as a chalkboard. No. Pinterest to the rescue and I wandered over to the tile isle to get matching grout. It comes in several colors, so that was the easiest part of this project. I had to re-buy the first batch of paint I'd returned, and came home to get started.
My word of advice? If you do make your own, do it in small batches. The grout soaks up all the extra moisture from the paint and it gets real thick, real fast.
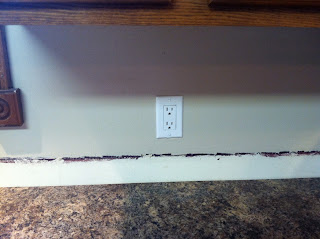


When we changed out our awesome white 90's laminate top, we opted for no 4" backsplash. That line is from layers of paint and wall paper (again, the 90's where our clothes were baggy and our houses were old lady chic).
After scraping and sanding that, paint was mixed and away I went.

For our approximately 20 feet of backsplash, the whole project took about 2 hours. That includes mixing the paint, two coats and removing/replacing all the outlet covers.

Here's what I LOVE about it- there is barely any texture to it. I was concerned that it would end up all rough and when someone wanted to change it, it would be a pain. Nope! It might take a quick sand, but nothing time, or clean up, intensive.
No comments:
Post a Comment